All about Symfony controllers

With a Symfony controller we can handle request from a browser or mobile phone. It is not only limited from this sources, but we will stay for now by this two sources.
There are a few common request methods what we going to handle in this article. The Post, Put, Get and Delete. Symfony contain many useful methods and annotations to make it easier to create fast a web view.
Symfony response types
A response type or Content-Type tells your browser or mobile browser what kind of content it returns. In this way the client can act correctly and use the correct parser for the type of content.
By example, if the browser not know that it going to get XML content back. It simply not can correctly handle the XML. At the end the browser can most of the time handle the content, but it will be always more preferable to add directly the correct Content-Type. By example the header: 'Content-Type: application/xml'. It tells the browser, that the given content will be in the XML format. The browser can now handle it in the correct way. Symfony can by using the correct method, set self the correct Content-Type header.
Symfony controllers can respond with different types without adding the headers manually. A few examples are HTML, JSON or XML. JSON or XML, are most of the time used by APIs or mobile applications. We going in the first articles mainly dive into HTML content. Later we going add some javascript functionality where we going to use JSON or XML content.
Create our first controller
To simply create a controller which only returns a html string, we can create a file in the controllers directory, based in our AppBundle/controllers folder. Let's say we going name it EchoController. It will return the content what we give as parameter. Like an echo in a cave.
<?php

namespace AppBundle\Controller;

use Sensio\Bundle\FrameworkExtraBundle\Configuration\Method;
use Sensio\Bundle\FrameworkExtraBundle\Configuration\Route;
use Symfony\Component\HttpFoundation\Response;

class EchoController
{

    /**
     * @Route("/echo/{word}")
     * @Method({"GET"})
     */
    public function echoAction(string $word)
    {

        return new Response(
            '<b>You said: '. $word .'</b>'
        );
    }
}
This is a basic controller what do not more then accept the GET method on the route /echo/{word}. By replacing {word} by a keyword like php, you will see: "You said: php".
It is import to give always a response back.
Methods
There are few methods what we will be using in our articles. It are not all the possible methods, for more information about a complete list of methods, I will reference to the Mozilla development network HTTP methods list.
GET
The GET method is the basic request method what the browser use. It try to get a resource from a domain. If you go to https://www.google.nl. It will do a get request to the index of the domain. With the GET method, you can only use GET parameters. By example ?q=search_string.
The benefit is, that you can always return to the url you used. The negative thing can be, that it is also in the browser history. A bad example is the following GET parameters ?username=admin&password=test1234. It will be easily capture by monitoring the browser history. Better is use the POST method in this case.
POST
We will use the POST request to create a resource or product. Sometimes the POST is also used to update an resource, but we going to split the functionality where possible.
To set content, we can use JSON but also form data. Most of the time we will using the post parameters by sending a form or serialise the data using javascript.
PUT
PUT we going to use to update an resource. When we going to change information about a product, we going to request a update with the PUT call.
DELETE
Delete we going to use to remove a resource or product from our database or shopping cart.
Like written below, it is not necessary to define different actions for each method. We can combine the methods in one function.
Method definitions
It is easily to add methods to a route. With the @Method annotation we can define which methods are allowed. Default there is no restriction at all. So if you want only GET responses. just add @Method({"GET"}) to your annotations. If you want GET and POST allowed, just add POST to the object by adding: @Method({"GET", "POST"}).
Method restrictions
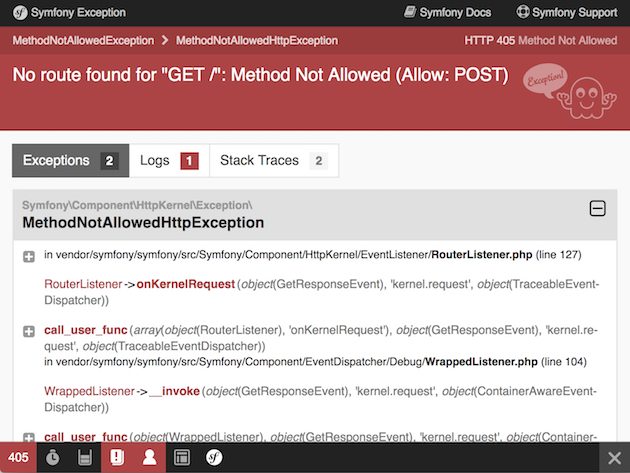
The controller contains a route and a method. The allowed method in the next example call will be the GET method. If you try to request the echo controller with a POST method. You will get a "method not allowed" exception.
To allow more methods, you can simply add the method to the Method annotation: '{"GET", "POST"}'. This example will add the GET and POST to the allowed methods.
Sometimes you want to create multiple methods on one route. But you will be free to choose for the option to create a action per method. By example, one for the GET and one for the DELETE method.
<?php

namespace AppBundle\Controller;

use Sensio\Bundle\FrameworkExtraBundle\Configuration\Method;
use Sensio\Bundle\FrameworkExtraBundle\Configuration\Route;
use Symfony\Component\HttpFoundation\Response;

class RecordController
{

    /**
     * @Route("/record/{id}")
     * @Method({"GET"})
     */
    public function getRecordAction(int $id)
    {
		// Do some actions to get the record
    }

    /**
     * @Route("/record/{id}")
     * @Method({"DELETE"})
     */
    public function deleteRecordAction(int $id)
    {
		// Delete a record
    }
}
In this way it is more easier to split the functionality into different actions. The first action make it possible to get a record, the second one to delete the record.
Create more complex routes
Routes can contain parameters which are defined between { } brackets. An example could be {id} it match with the action parameter int $id. If you not add the $id, you can add the Request object by lazy loading. Just add Request $request to the action. I will show how to do by 2 examples:
<?php

namespace AppBundle\Controller;

use Sensio\Bundle\FrameworkExtraBundle\Configuration\Method;
use Sensio\Bundle\FrameworkExtraBundle\Configuration\Route;
use Symfony\Bundle\FrameworkBundle\Controller\Controller;
use Symfony\Component\HttpFoundation\Request;

class DocumentController extends Controller
{
	/**
	 * @Route("/document/{id}", requirements={"id" = "\d+"}, defaults={"id" = 111}, name="first_document")
	 * @Method({"GET"})
	 */
	public function firstDocumentAction(int $id = 111)
	{
        // Use the document id to load the document
        echo 'Document id: ' . $id;
    }
	/**
	 * @Route("/document/{id}", name="second_document")
	 * @Method({"GET"})
	 */
	public function secondDocumentAction(Request $request)
	{
		$id = $request->get('id');

        // Use the document id to load the document
        echo 'Document id: ' . $id;
    }
}
In the above examples there are a few more complexer routes defined. With the requirements parameter, you can define how the given values need be formatted. If you in the above example try to load /document/doc223 it will be not loaded, because the route will not be matched. The d+ means that you need add a numeric value. With the URL /document/223 the route will be matched and used.
It is possible to give a default. That can be done in 2 ways. It can be set in the route annotations defaults or as a action parameter definition int $id = 111.
The default is a good way to combine the create and update. The default can be 0, in that case it will create a new resource/product. If it is not 0 then it will update the specified resource/product.
In the next section of this article we going to talk about the response of the controller.
Different ways to return responses
Out of the box there are different ways to return the responses. Different methods for different content types.
<?php

// Render view
return $this->render('path/to/view', ['data' => 'symfony']);

// Raw response
return new Response('<b>this is html in php</b>', 200, ['content-type' => 'text/html');

// JSON response
return new JsonResponse(['index' => 'value'], 200, ['content-type' => 'application/json'], false);
Render function (view, data, response object)
The most used way is to us the render function. The first parameter is the view what will be parsed. The second parameter is a array with data what can be used in the view and the third parameter is the Response object. The last two parameters are not required.
Response object (content, statuscode, headers)
The response object is used to output the string you put in the first parameter. If you not need a whole view to be parsed, but only a small string, then use the Response object. The second parameter is the statuscode and the third parameter is a array with custom headers.
JSON response object (JSON, statuscode, headers, JSON string as input)
JsonResponse returns a JSON object. If you put in an array, it will be automatically converted to a JSON object. It is also possible to set a JSON string, then the fourth parameter should be true. It says if the given content is already a JSON object or not. The other parameters are the same as the Response object.
Redirecting
One important functionality in the controller is the possibility to redirect to another route or URL. If a user is not allowed to visit a route, it can be redirected to a route. After submitting a form, it could be nice to send the user to a confirmation page or just back to the previous page with a confirming message.
There a view possible ways to redirect the visiter to another page. The most common used options i will explain.
<?php

// Redirect to url
return $this->redirect('https://www.google.nl', 302);

// Redirect to route
return $this->redirectToRoute('homepage', ['parameters' => '2'] 302);
Redirect function (url, statuscode = 302)
The redirect function is used to redirect to another URL. Sometimes it is not possible to use a route name, by example when it is a external website/page. In the case of our e-commerce project it could be the external payment processor. In that case we request a payment to the payment processor. It gives a URL back where we need redirect the user to.
Default the statuscode is set to 302. Remember to change it if it is necessary.
Redirect to route (routeName, parameters, statuscode = 302)
It is possible to redirect within your Symfony project from one method to another. Just by giving the route name as first parameter. The second parameter is to add specific required information to generate the route. If a route is /blog/{slug} then the second parameter could be ['slug' => 'slug-of-the-blog'].
In this way it is easy to redirect within the project. If the URL is changed in the controller. Automatically will be updated the route in all the controllers and views. That is the power of the route name.
Author: Michael Tijhuis
 As software developer i work daily on creating and improving web software. Backend applications are my passion.
From small admin sections to big APIs. In this blog I will write about Symfony and more.
As software developer i work daily on creating and improving web software. Backend applications are my passion.
From small admin sections to big APIs. In this blog I will write about Symfony and more.